
- What preparation do I need to do before installing the driver?
It is recommended that you save a configuration or golden configuration before installing any driver.
- Why do I need to create a Honeywell Home developer account?
Each developer account is limited to a certain number of access to Honeywell Home’s API every month. To get around this problem, we require that you create and use your own developer account.
- If I upgrade the driver, do I have to go through the process of authorizing the thermostats?
Not necessarily, when you first install the driver and enter the authorization code, if it’s successful, it will create a config file on the processor. This config file will remain on the processor unless you manually remove it. When you install a new version of the driver, leave the authorization code empty and it will automatically pick up the file and use the information in their to make its request. It is important that the instance number matches the previous driver.
- Why are TCC thermostats not supported? The Honeywell Home app allows me to import and control them.
The problem is Honeywell doesn’t let you authorize any thermostats that have been paired with the TCC app for third party control via the Honeywell Home API. Until Honeywell allows the authorization, TCC thermostats remain unsupported by this driver. Please use our Honeywell TCC driver to control those thermostats.
- The folder in the CH Setup App doesn’t show up after I put in all the information for the driver.
- Make sure the processor has access to the internet.
- Make sure you copied the entire authorization code correctly and did not leave out any characters.
- Make sure you are not re-using the authorization code. Once an authorization code has been used, it can not be used again.
- Make sure you use the authorization code within 1 minute of generating it. It has a very short expiration time (aprox. less than 1 minute).
- Make sure you are using the proper case when specifying the location name. (case-sensitive).
- Make sure that when you defined the app in the http://developer.honeywell.com website, you specified the return url/uri as None and not none (case sensitive).
- Wait at least 60 seconds. Sometimes, especially when there is a large number of thermostats, it can take longer for the cloud service to provide the driver all the thermostat information and the driver may take additional time to process it in order to create the folder.
- What is the “Instance Number” for and what should I put in?
The concept of the instance number is the same as how it’s used in the Crestron SIMPL HVAC Scheduler module. The instance number is used to create a unique filename on the processor so that it stores the token information needed to make requests. In normal circumstances you can leave it as one. You would need to change the instance number if the thermostats were paired to separate user accounts and you wanted to provide them access to thermostats from both accounts. An example of this is if the main house thermostats are paired to one user account and the guest house thermostats are paired to a separate user account. If you want thermostats from both properties to show up, you would need to add 2 instances of the platform driver, and each instance would need a unique instance number to work properly.
- If I later add thermostats or replace thermostats, do I have to go through all these steps again (get auth code, delete driver, re-add)?
Unfortunately yes, if you add thermostats, you have to go through this process again. This is a security feature from Honeywell. The authorization only allows you access to the thermostats that have been allowed. Since the newly added thermostats were not allowed, the driver can’t get access to it. The process is similar to updating the driver. First make sure you check the option to delete the configuration file in the drivers Installer Setup option. Then uninstall the driver. If you don’t check the option to delete the configuration file, it will just pick up the old (now stale) authorization data and the new thermostat won’t show up. It’s recommended that you wait until all the thermostats have been installed before going through the process of getting them to work with this driver.
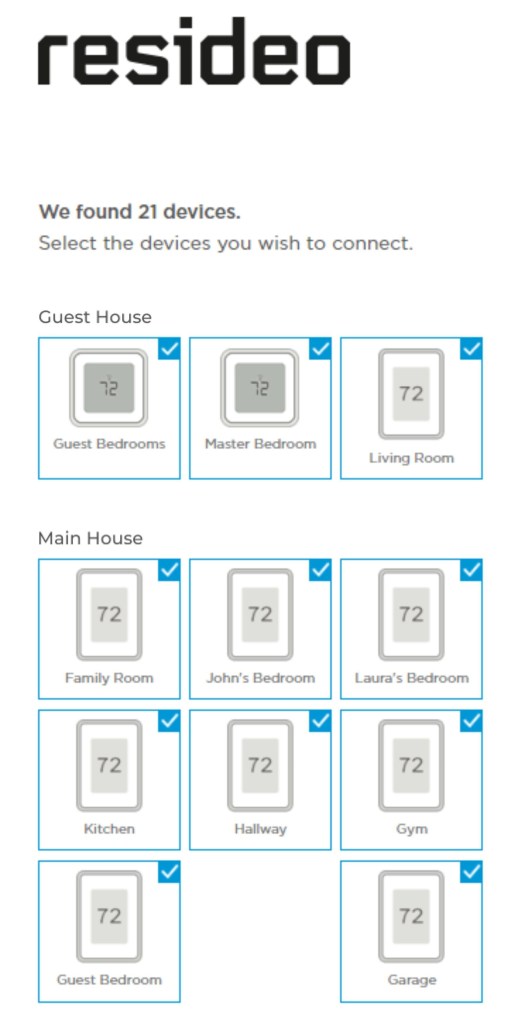
- Where can I find the “Location Name”?
When you are getting the authorization code, you have to select the thermostats per location and the location name itself. In the image below you can see 2 locations: Main House and Guest House. In this case you should use 2 driver instances for each location.
- I added new thermostats and they are paired to my account, how do I get them to show up in CH?
Unfortunately you need to uninstall the driver, taking care to make sure you check the option to the Delete the Configuration in the “Installer Settings” in the main platform driver. Than install the driver again using a new authorization code. The reason for this is a security feature on the manufacturer’s side. The existing authorization is paired with a specific set of devices and can not be updated dynamically. The only option is to generate a new authorization code that is paired with an updated list of devices. A word of warning, this will also delete all the quick actions associated with this driver.


Reviews
There are no reviews yet.